


How to Plan Plumbing Layout for a Bathroom Remodel

Most DIY bathroom remodelers miss a tiny but costly detail , a vent pipe that’s too small. That mistake can bring leaks, foul odors, and pricey re‑work. Below is a seven‑step checklist that gets your plumbing right the first time.
Step 1: Assess Existing Layout & Measure Rough‑In Distances
First, pull back any drywall or tile that covers the current pipework. Note where the toilet, sink, and shower sit in relation to studs and joists. Measure the centerline of each fixture to the nearest finished wall , the standard is 12 in for a toilet flange and about 18 in for a vanity drain. Record these numbers in a simple sketch.
Next, check the height of water supply lines. Most supply lines sit 21 in above the finished floor, but local codes in Orange County can vary, so verify with your city’s building department.
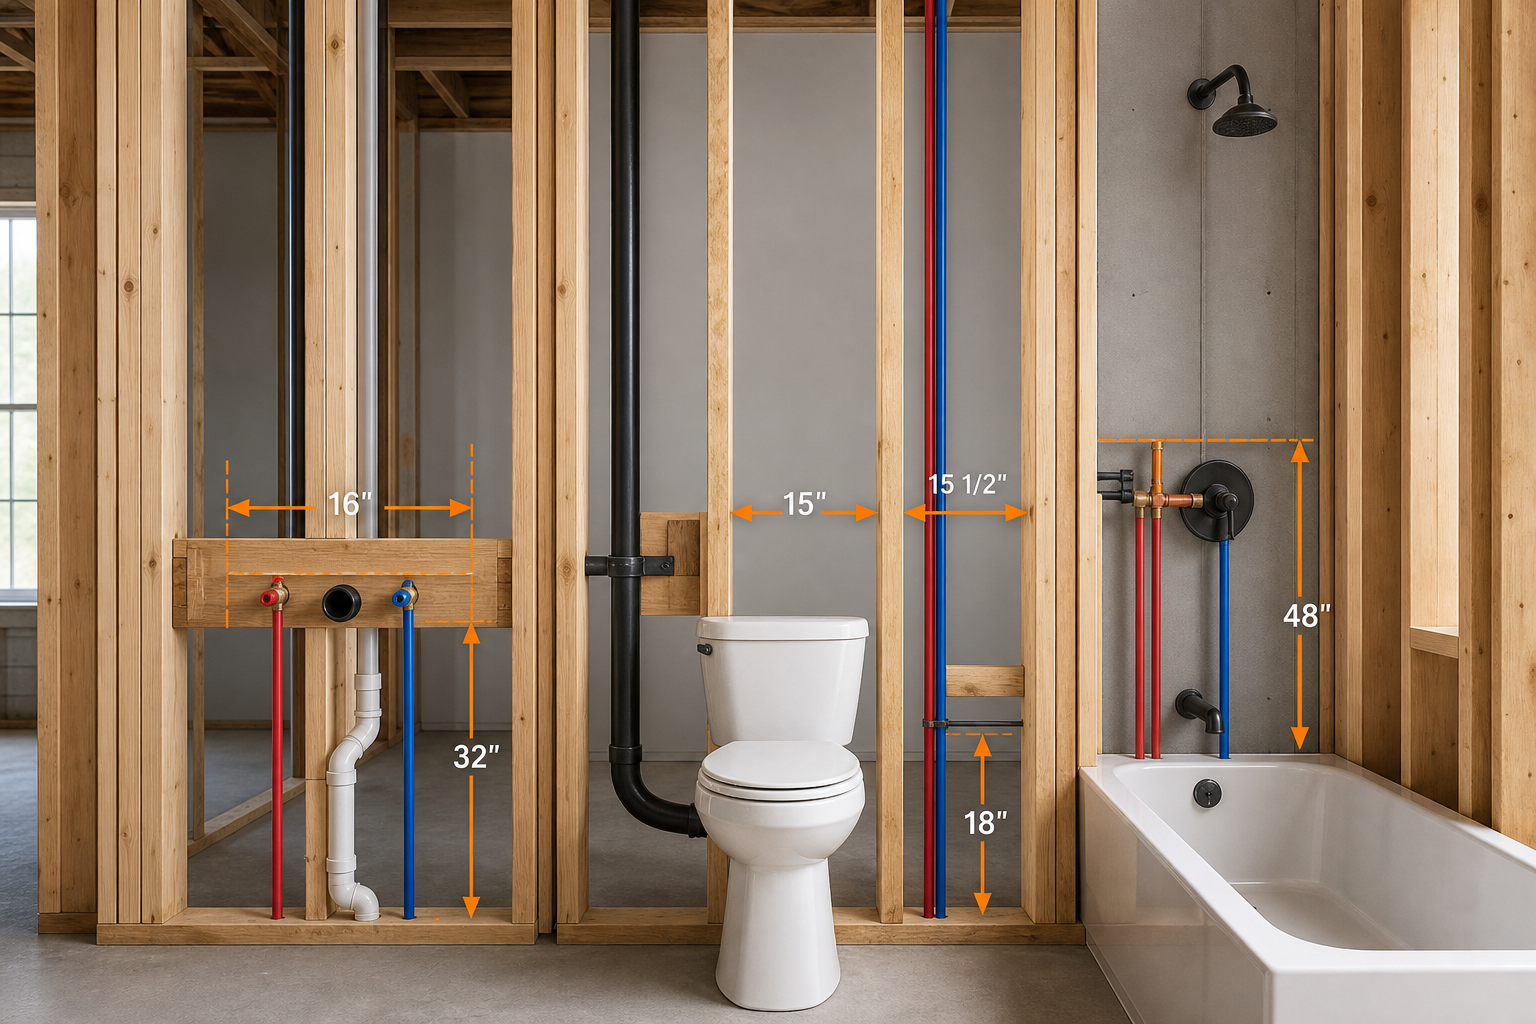
By the end of this step you should have a clear map of where each fixture’s rough‑in point lives and how far each pipe runs.
Step 2: Design Drainage Paths & Determine Pipe Sizes
Start with the main drain stack , usually a 3‑in pipe that runs vertically behind the wall. Connect each fixture to this stack using the proper pipe diameter. Toilets need a 3‑in branch, while sinks and showers can use 1½‑in to 2‑in pipe.
Use the rule of thumb from the International Plumbing Code : keep the horizontal drain slope at least ¼ in per foot. A steeper slope isn’t required and can cause fixture‑height issues.
When you size the pipes, remember that larger runs need larger diameters to avoid clogs. A typical three‑fixture bathroom uses pipe sizes ranging from ¾ in for short supply lines up to 3 in for the main drain.
Primewest Plumbing often recommends using PEX for supply lines because it’s flexible and resists corrosion.
Here’s a quick visual of a typical layout:
Fixture | Pipe Size | Typical Length |
Toilet | 3 in | 4‑6 ft |
Shower | 2 in | 5‑8 ft |
Vanity Sink | 1½ in | 3‑5 ft |
By now you should have a drainage diagram that meets slope requirements and pipe‑size standards.
Step 3: Plan Venting System & Choose Vent Types
Vents let air enter the drain line so water flows smoothly and sewer gases stay out of the home. The smallest vent size allowed for up to two fixtures is 1¼ in. Anything larger than that is fine, but going smaller will cause code violations.
There are two main vent styles: a wet vent that doubles as a drain for a sink, and an individual vent that rises straight up to the roof. Wet vents save space but must be carefully sized; the vent pipe should be at least half the size of the drain it serves.
Locate the vent pipe at least 6 in above the flood‑level rim of the fixture. This height keeps water from back‑siphoning into the vent.
Pro Tip: Use a venting device that complies with local code, as many Orange County jurisdictions still require a full roof vent for toilets.
By now you should know where each vent will run and the exact pipe diameter it needs.
Step 4: Integrate Electrical Requirements & GFCI Placement
Every bathroom outlet must be a GFCI and sit no farther than 36 in from the edge of the sink or tub. Plan dedicated 15 A circuits for lights, fans, and heated towel rails. Heavy‑duty appliances like a whirlpool tub need a 20 A circuit.
Run the electrical conduit alongside the supply lines but keep at least 1 in of clearance to avoid heat buildup.
Primewest Plumbing can coordinate with a licensed electrician to pull permits and ensure everything meets the NEC and local codes.
By the end of this step you’ll have a clear map of outlet locations, circuit loads, and GFCI placements.
Step 5: Address Structural Constraints & Cleanout Locations
Look for joists, studs, and any load‑bearing walls that might block a new pipe run. Drill only where you have at least a 1 in clearance from the edge of a joist to avoid weakening the structure.
Plan cleanouts at every 4‑turn point in the horizontal drain. A cleanout lets you snake a drain rod later if a blockage occurs. The code limits you to four 45° turns before a cleanout is required.
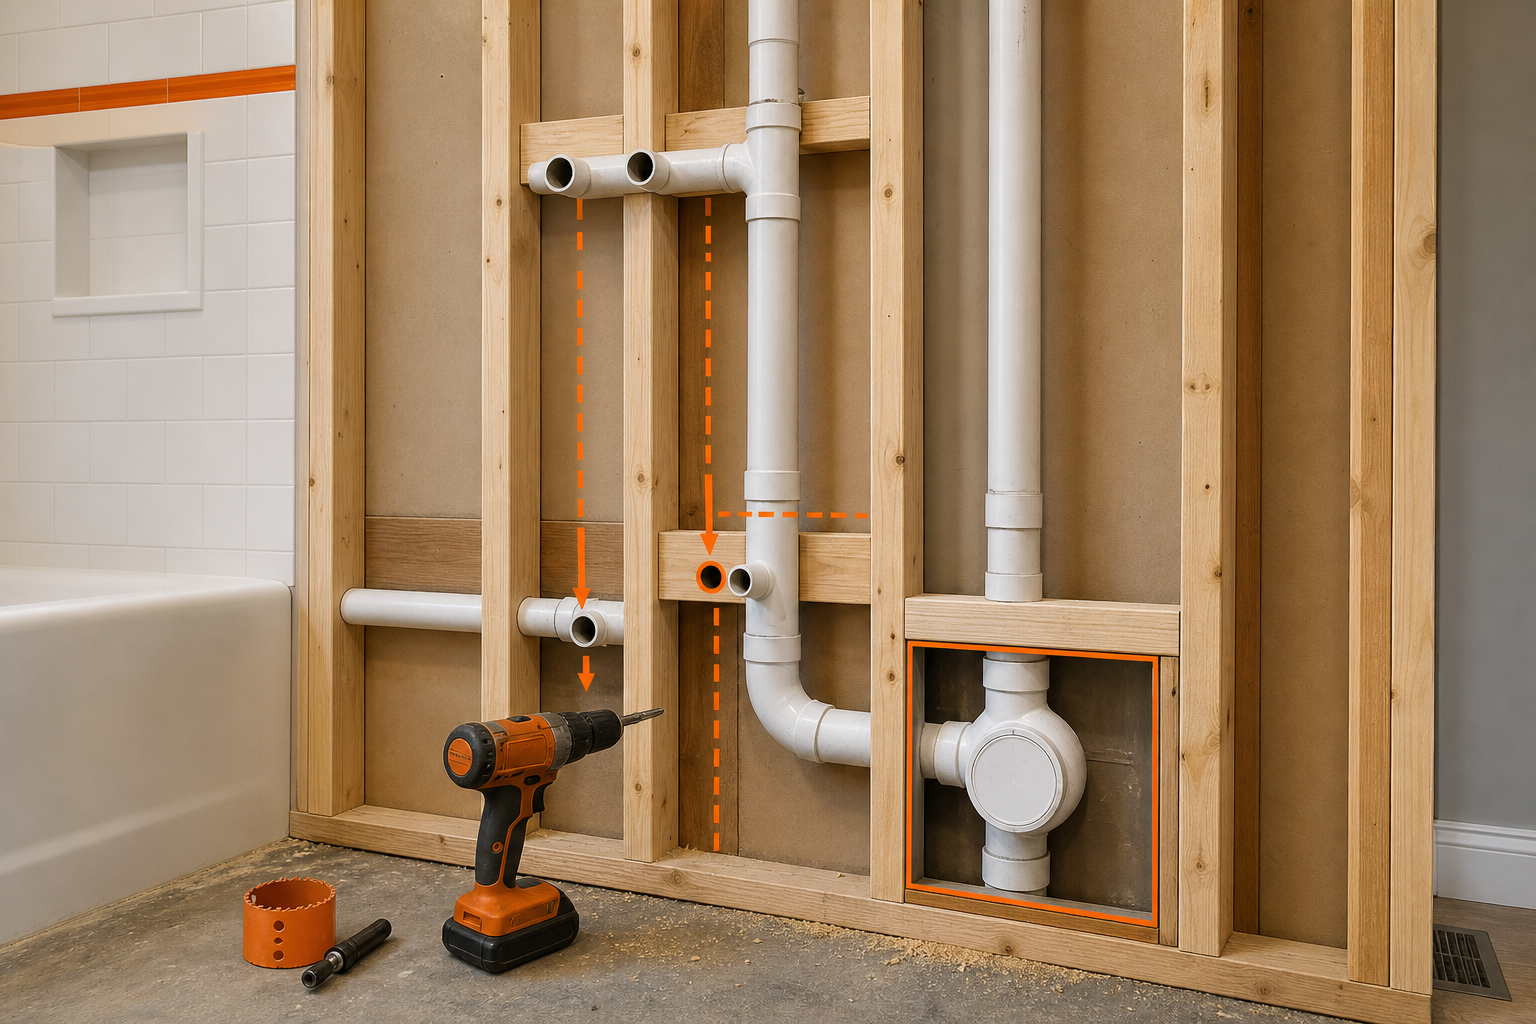
By now you should know which walls need reinforcement and where cleanouts will sit for future maintenance.
Step 6: Create Detailed Sketch & Review Code Compliance
Take all the measurements, pipe sizes, vent locations, and electrical spots you’ve gathered and draw a full‑scale plan. Use graph paper or a digital design tool; such tools can help calculate pipe lengths and flag code issues.
Cross‑check your sketch against the International Plumbing Code (IPC) and the Uniform Plumbing Code (UPC). The local building department in Orange County usually adopts the IPC 2021 edition, so make sure your vent sizes and cleanout spacing match those rules.
For a quick reference, see your local building department’s bathroom remodel guidelines which outline required clearances and slope limits.
When you finish, you’ll have a plan that a permit reviewer can sign off on without asking for revisions.
Step 7: Consult a Licensed Plumber & Finalize Plans
Before you order any pipe or break walls, bring your sketch to a licensed professional. Primewest Plumbing reviews the layout, checks for hidden code traps, and can submit the permit application for you.
The plumber will verify that vent heights, pipe slopes, and cleanout locations meet local standards. They’ll also suggest any material tweaks that save time or money, such as using PEX instead of copper where permissible.
After the review, the plumber signs off on the plan. You can then move forward with confidence, knowing the work will pass inspection the first time.
For homeowners in Orange County, a quick call to Dana Point, CA Local Plumber can set up that consultation.
FAQ
What is the first thing I should measure when planning a bathroom plumbing layout?
The first thing to measure is the centerline distance from each fixture to the nearest finished wall , 12 in for a toilet flange and about 18 in for a vanity drain.
How steep should the drain slope be?
The code requires a minimum slope of ¼ in per foot for horizontal drain pipes.
Do I need a vent for each fixture?
Not always; a properly sized wet vent can serve a sink and shower together, but a toilet usually needs its own vent of at least 1¼ in.
Where should I place GFCI outlets?
Every bathroom outlet must be a GFCI and be within 36 in of the edge of a sink or tub.
Can I use an air‑admittance valve instead of a roof vent?
Only if your local code allows it; many Orange County jurisdictions still require a full vent for toilets.
How often do I need cleanouts?
Place a cleanout after every four 45° turns in a horizontal drain line, or at least once per bathroom.
Key Takeaway:A solid bathroom‑remodel plumbing plan follows a seven‑step checklist: locate centerlines, size pipes, respect clearances, maintain proper slope, and install code‑approved vents.
Ready to turn your sketch into a permit‑ready plan? Read Primewest’s full guide to reliable home plumbing services and schedule a free consultation.


Comments