


How to Fix a Running Toilet Step by Step
- Primewest Plumbing
- 4 days ago
- 11 min read

A running toilet can waste water for hours before you notice it. The fix is often simple, but the wrong adjustment can leave the leak in place. Primewest Plumbing recommends starting with the two main causes: a worn flapper or a fill valve that does not shut off. Work through the steps below, then stop if the shut-off valve or tank fittings show signs of failure.
Table of Contents
Step 1: Diagnose the Cause and Gather Your Tools
To learn how to fix a running toilet, first determine where the water is going. Remove the tank lid and place it on a flat, safe surface. Porcelain can crack if it tips onto the floor.
Look inside the tank while the toilet is running. If water rises high enough to spill into the overflow tube, the fill valve may need adjustment or replacement. If the water level stays below the overflow but the toilet starts by itself every few minutes, water is likely leaking past the flapper.
You can also add a few drops of food coloring to the tank. Do not flush. Wait about 10 minutes. If color appears in the bowl, the tank is leaking through the flapper or flush valve seal. If the water only runs into the overflow tube, focus on the fill valve and its float .
Press the float upward by hand. If the water stops, the float setting may be too high. If water keeps flowing, the fill valve may have debris inside it or a worn diaphragm. The fill valve controls tank refill. The flapper holds the tank water above the flush valve.
Gather these items before you begin:
An adjustable wrench or adjustable pliers.
A screwdriver if your valve uses one for height adjustment.
A replacement flapper made for your toilet model.
A compatible replacement fill valve.
A small bucket and several towels.
A sponge or wet vacuum for leftover tank water.
Food coloring for the leak test.
Take a quick photo of the tank before removing parts. It gives you a reference for the chain, refill tube, and float setting. For homes in Orange County, Primewest Plumbing also handles residential plumbing repairs when a toilet problem points to a larger leak or fixture issue.
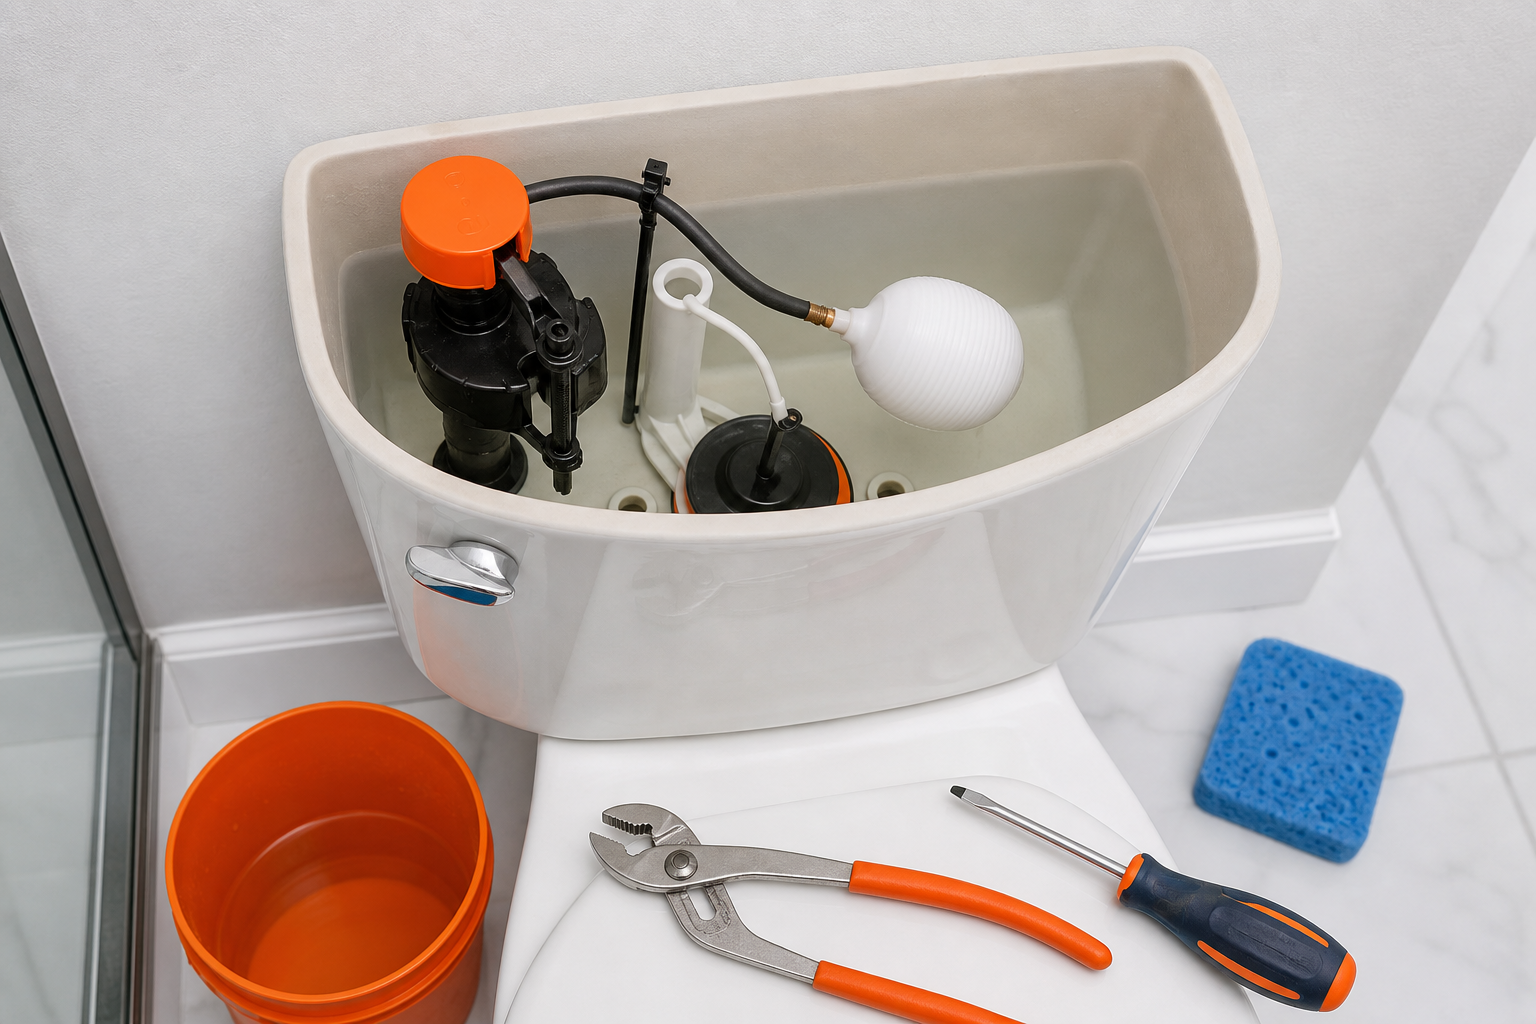
By now you should have:a likely cause, the right replacement part if needed, and a dry work area with towels ready.
Step 2: Shut Off the Water and Empty the Tank Safely
Before you work on a running toilet, shut off the water at the valve behind or beside the toilet. A quarter-turn valve closes when you turn its handle 90 degrees. An older screw-style valve needs several turns clockwise.
Turn the valve slowly. Then flush the toilet and watch the tank. The water should fall without refilling. If it keeps rising, the stop valve did not close fully. Do not disconnect the supply line until you confirm that the water has stopped.
Every household should know where the main water shut-off is located. It may be near the water meter, where the service line enters the building, or in a utility area. Locate it before starting work. An old fixture valve can leak or fail when moved after years without use.
Once the tank is empty, place a towel under the supply connection. Loosen the supply line only if you are replacing the fill valve. A small amount of water will remain inside the line and valve. Let it drain into a bucket rather than onto the floor.
Flush again to remove as much water as possible. Use a sponge for the last layer. A wet vacuum can remove the remaining water faster, but use one that is designed for liquids. Do not use a regular household vacuum.
Keep the tank lid away from the work area. Set tools on a towel, not on the porcelain rim. This reduces the chance of a dropped wrench or screwdriver chipping the fixture.
Pro Tip:If the shut-off valve will not close, stop before removing the supply line. Close the main house valve and arrange a repair instead of risking a spray of pressurized water.
For a flapper-only repair, you may not need to disconnect the supply line. The tank still needs to be isolated from incoming water so the repair can be checked without the valve running.
By now you should have:a closed supply valve, an empty tank, and a bucket beneath any connection you plan to loosen.
Step 3: Inspect and Replace the Flapper and Adjust the Chain
A flapper problem often causes a toilet to run in short bursts. Water slowly leaves the tank through the flush valve. The fill valve then turns on to restore the lost water.
Reach into the empty tank and inspect the flapper. Look for cracks, warping, mineral deposits, or soft rubber that breaks apart when touched. Black residue on your fingers is another sign that the rubber is deteriorating. Check the rim below the flapper too. A nick or buildup there can prevent a seal even with a new part.
Press the flapper down gently. If the running stops, the flapper is not sealing well. Do not rely on holding it down as a lasting repair. The flush handle must lift it during every flush, so the part needs to sit flat on its own.
Remove the old flapper
Unhook the chain from the flush handle lever.
Lift the flapper from the two mounting tabs on the flush valve.
Wipe the sealing rim with a clean cloth.
Remove mineral scale without scratching the plastic or rubber.
Choose a replacement that matches the original size and design. Some toilets use a two-inch flapper. Others use a larger valve or a model-specific seal. A part that looks close may still leave a slow leak.
Install and set the chain
Fit the new flapper over the mounting tabs. Attach the chain to the handle lever. Leave a small amount of slack. The chain should lift the flapper when you press the handle, but it must not hold the flapper open after the handle returns.
If the chain is too short, the flapper may not close. If it is too long, it can slip under the flapper and hold it away from the rim. Make one adjustment at a time, then press the flapper down and check that it sits flat.
Inspect the flush valve rim while you are there. A crack, deep groove, or damaged seat can cause a new flapper to leak. That problem needs a flush valve repair rather than another flapper.
Primewest Plumbing can inspect the fixture when a replacement flapper does not stop the leak. This is especially useful in a rental unit, a commercial restroom, or a bathroom where the water keeps returning after several adjustments.
Leave the supply off until the next step if you plan to replace or clean the fill valve. If you are testing only the flapper, open the valve slowly and watch the tank as it fills.
Decision rule:intermittent running usually points to the flapper or flush valve seal. Constant flow into the overflow tube points to the fill valve or its water-level setting.
Step 4: Adjust, Clean, or Replace the Fill Valve
When the toilet runs constantly, the fill valve may not shut off at the correct level. Start with adjustment. Replace the valve only when adjustment and cleaning do not solve the fault.
With the water on, lift the float slowly. If the flow stops, lower the float setting. Many modern valves have a screw or knob on the valve body. Turn it in small increments, then flush and let the tank refill. Avoid forcing the adjustment at either end of its range.
The target water level depends on the toilet and valve. In many setups, the water should sit about one-half inch below the top of the overflow tube. Follow the mark inside the tank or the instructions for the replacement valve when they differ.
If adjustment has no effect, close the supply and remove the valve cap according to its design. Some caps lift and turn. Others use a screw. Check the diaphragm or seal for grit and mineral scale. Rinse the part under clean water. Wipe away deposits with a soft cloth. Do not damage the small pin or flexible seal inside.
If debris is trapped in the valve body, reconnect the supply line only after placing a rag over the open valve. Crack the shut-off valve briefly. A small flow can flush loose grit into the rag. Close the supply again before reinstalling the cap.
The fill valve controls tank refill. That makes the refill test useful: after a flush, the valve should fill the tank and stop cleanly when the float reaches its set point.
Replace the fill valve when needed
If cleaning does not stop the flow, replace the valve. Confirm the replacement matches the toilet's tank opening and refill setup. Universal parts still need the correct height and hose connection.
Close the shut-off valve and flush the tank.
Remove the remaining water with a sponge or wet vacuum.
Place a bucket beneath the supply connection.
Disconnect the supply line from the old fill valve.
Remove the retaining nut beneath the tank.
Lift out the old valve and wipe the tank opening clean.
Before fitting a new valve, check its rubber washer. The tapered side normally faces down toward the tank opening, but follow the valve instructions. Place the valve through the opening. Set its height before tightening the retaining nut.
For a Fluidmaster 400H or similar adjustable valve, use the height knob to match the tank. Dry-fit the valve first. Leave enough space above the flush valve and below the tank lid. The refill tube should reach the overflow tube without kinks. Clip it above the overflow opening rather than pushing it deep inside.
Hand-tighten the retaining nut, then snug it slightly with pliers if needed. Do not overtighten. Porcelain can crack, and a crushed washer may leak. Reconnect the supply line by hand before making a small final turn with pliers.
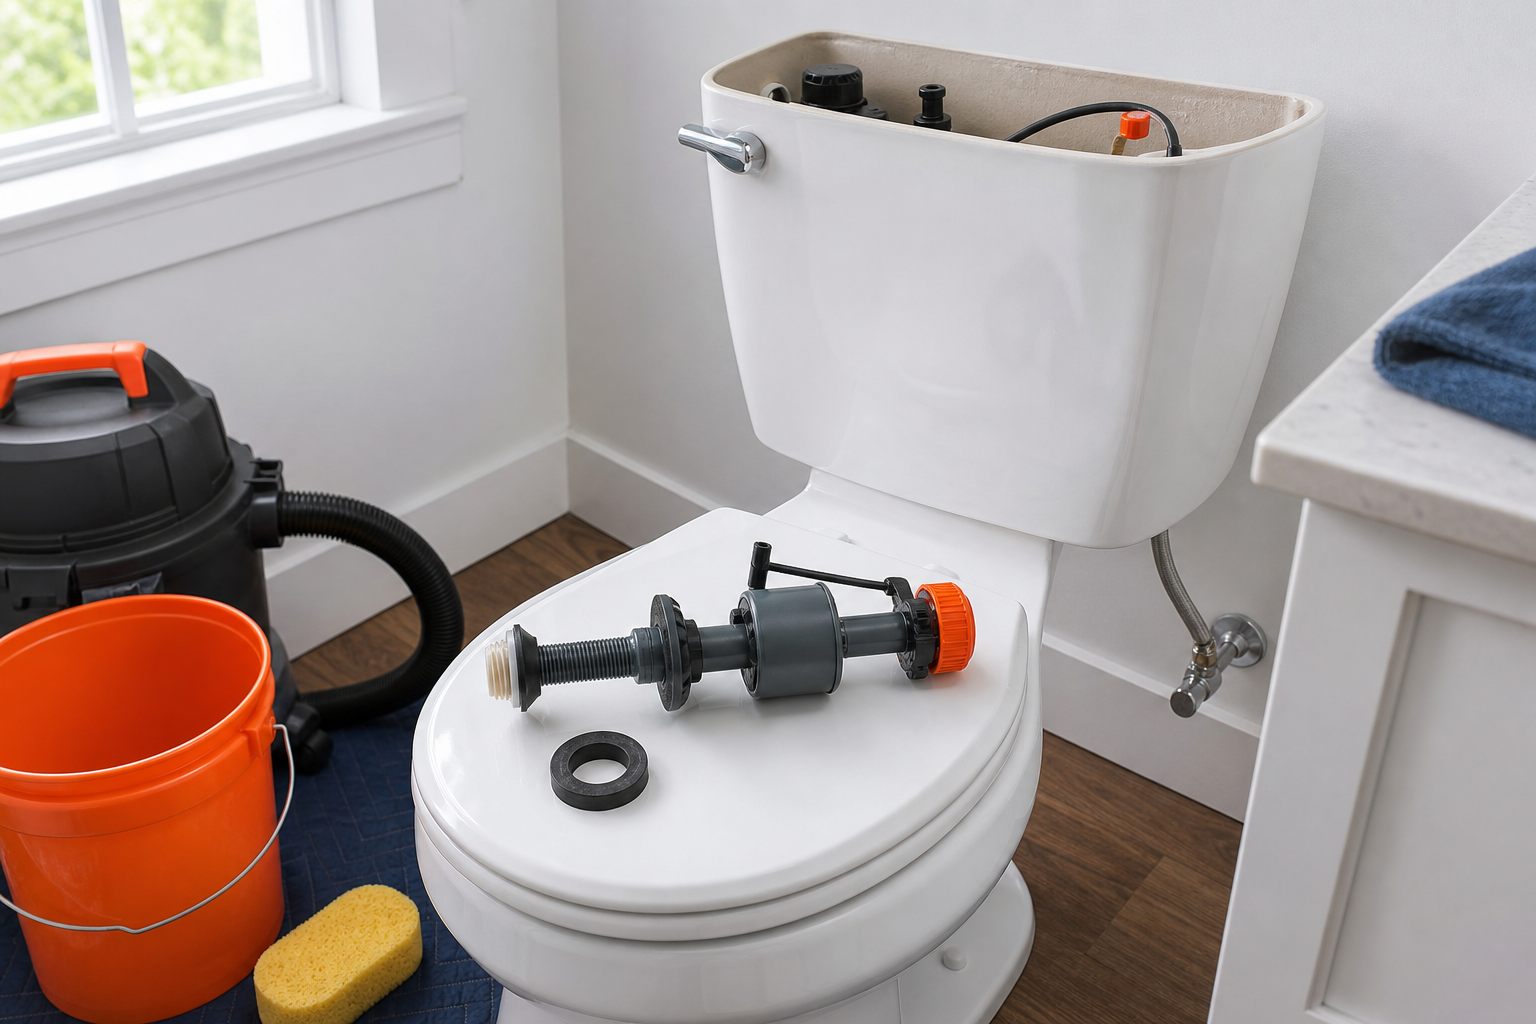
Reconnect the refill tube. Open the shut-off valve slowly. Watch the underside of the tank and the supply connection while water enters. Close the valve at once if you see a drip.
By now you should have:a clean or new fill valve, a correctly fitted refill tube, and a tank that can refill without leaking at the base.
Step 5: Set the Water Level and Account for Hard-Water Buildup
Correct water height is part of how to fix a running toilet. A level that is too high sends water into the overflow tube. A level that is too low can weaken the flush or leave the bowl below its normal refill level.
Let the tank fill completely. Look at the water relative to the overflow tube. Adjust the float screw, slider, or knob in small steps. Flush after each change. Do not set the level by guesswork when the tank has a marked water line.
The bowl may need a separate adjustment on some replacement valves. After flushing, check whether the bowl returns to its usual level. If the bowl level is wrong, follow the valve instructions for the bowl refill setting. Do not pour water quickly into the bowl during a test, since that can trigger a flush.
Check for hard-water buildup
Mineral scale can collect around the flapper rim, inside the fill valve, and near the overflow tube. It may look like chalky white crust. Scale can keep a seal from sitting flat or stop a float from moving freely.
Clean accessible buildup with a soft cloth and plain water. Use a cleaner only if its label says it is safe for toilet seals and valve parts. Avoid harsh chemicals that can damage rubber. Never mix cleaning products.
If scale returns quickly, keep replacement seals on hand. A seal is often easier to replace than a complete valve, but it must match the valve design. An anti-scale part may help in some systems, yet it should be compatible with the toilet and local water conditions.
Do not scrape plastic seats with a blade. A small groove can become a permanent leak path. If the rim is damaged or the buildup will not come off, have Primewest Plumbing assess the flush valve before more parts are installed.
Use this checkpoint:the tank should stop filling below the overflow opening, and the float should move freely without touching the tank wall.
Step 6: Test the Repair and Know When to Call a Plumber
The final step in fixing a running toilet is a controlled test. Open the shut-off valve fully, but do it slowly. Watch the supply connection, the valve base, and the tank while it fills.
Let the tank reach its set level. Listen for the fill valve to stop. A faint hiss may mean water is still passing through the valve or refill tube. Look into the overflow tube. Water should not stream into it after the tank reaches its mark.
Flush once. The flapper should lift fully and then drop into place. The chain should not catch beneath it. The tank should refill at a steady rate and stop at the same level as before.
Wait several minutes without touching the handle. Then listen again. A short burst of water suggests a slow tank leak. Repeat the food-color test if the cause remains unclear. Color moving into the bowl confirms that tank water is passing the flapper or flush valve seal.
Dry the floor and each connection with a towel. Check again after 15 minutes. Small leaks at a supply nut can take time to show. Place a dry piece of tissue beneath the connection if you need a simple way to spot a drop.
Stop the DIY repair when:
The shut-off valve will not close.
The supply line or tank connection keeps leaking.
The porcelain tank or flush valve has a crack.
A new flapper still leaks after the rim is clean.
The toilet rocks or leaks at its floor seal.
More than one fixture runs or drains poorly at the same time.
A single running toilet usually involves the tank parts. Several affected fixtures may point to a wider plumbing issue. In that case, work with Primewest Plumbing's toilet repair service instead of replacing parts at random.
Property managers should document the repair date and part changed. A photo of the final water line can help with later maintenance. Homeowners should also check the room below the toilet for stains if the fixture has been running for a long time.
A running toilet is one part of home maintenance. If a water stain also appears near an air-conditioning line, keep that issue separate and use a service guide focused on AC refrigerant leak repair costs . The two systems need different tests and different repair methods.
Primewest Plumbing serves homeowners, landlords, and commercial property managers in Orange County. A technician can identify whether the failure is inside the tank, at the fixture seal, or in the supply connection.
By now you should have:a tank that fills to the right level, a flapper that seals, and a toilet that stays quiet after several flushes.
FAQ
How do I fix a running toilet quickly?
Start by checking whether water is entering the overflow tube or leaking past the flapper. Lower the float if the tank is overfilling. Replace the flapper if the toilet runs in short bursts. Shut off the supply before removing any valve or supply line. If the valve will not close, use the main shut-off and get professional help.
Why does my toilet run every few minutes?
A toilet that runs every few minutes usually has a slow leak past the flapper or flush valve seal. Add food coloring to the tank and wait without flushing. Color in the bowl confirms that tank water is escaping. Replace the flapper if its rubber is worn, warped, or covered with scale.
How high should the water be in a toilet tank?
The water should usually stop below the top of the overflow tube, often about one-half inch below it. Use the tank's marked water line when one is present. A level above the tube can cause constant running. A level that is too low can reduce flush strength or affect bowl refill.
Can hard water cause a toilet to keep running?
Hard water can cause a toilet to keep running by leaving mineral scale on the flapper rim or inside the fill valve. Clean accessible deposits with a soft cloth and water. Replace a damaged seal when cleaning fails. Do not scrape plastic parts or mix chemical cleaners inside the tank.
When should I call a plumber for a running toilet?
Call a plumber when the shut-off valve fails, the tank or flush valve is cracked, or the toilet still runs after the flapper and fill valve have been checked. Professional help is also wise when the floor seal leaks, the toilet rocks, or several fixtures show drainage problems.
Conclusion
Most running toilets can be traced to the flapper, fill valve, or water level. Check those parts in that order, shut off the water before removing anything, and test the repair more than once. If the valve, porcelain, or floor seal shows damage, contact Primewest Plumbing for a clear diagnosis before the small leak becomes a larger repair.


Comments