


How to Install a Backflow Preventer
- Primewest Plumbing
- Aug 14
- 7 min read

A backflow preventer must match the water hazard and the pipe layout. A poor fit can leave drinking water exposed or make testing impossible. The steps below explain how to install a backflow preventer, where it belongs, how to check it, and when the work should go to a licensed plumber.
Table of Contents
Step 1: Choose the Correct Backflow Preventer and Installation Location
Step 2: Shut Off the Water, Relieve Pressure, and Prepare the Piping
Step 3: Install the Assembly in the Correct Flow Direction and Orientation
Step 4: Restore Water Slowly, Check for Leaks, and Verify Operation
Step 5: Finish the Installation, Protect the Device, and Know When to Call a Plumber
Step 1: Choose the Correct Backflow Preventer and Installation Location
The first step in learning how to install a backflow preventer is choosing the right device for the risk. A vacuum breaker may protect a hose connection. Other approved device types may suit lower hazards. Higher contamination risks require an approved method selected under applicable rules.
Backflow happens when water moves in the wrong direction. Back pressure can push water back into the supply. Back siphonage can pull water backward after supply pressure drops.
Before buying anything, identify these conditions:
Pipe size and pipe material.
Water supply type and expected flow.
Connected equipment, irrigation, or other specialized water-use systems.
Required device type under the local water purveyor's rules.
Available space for shut-off valves and annual testing.
Place the assembly on the supply side of the protected equipment. Follow the device instructions for height, clearance, and drainage. Many installations need the assembly above grade or above the highest downstream outlet. A commercial site may need a recorded test and a certified tester.
In Orange County, the safest path is to have Primewest Plumbing confirm the hazard level before materials are ordered. Its water filtration installation guide also shows why equipment tied to a main water line needs a code-aware installation plan.
Condition | What to check | Installation concern |
Outdoor irrigation | Device type and elevation | Protect it from freezing, dirt, and lawn equipment |
Residential fixture | Cross-connection risk | Keep access clear for service |
Commercial system | Local testing rules | Allow room for test ports and records |
High-hazard connection | Approved prevention method | Provide a safe drain path |
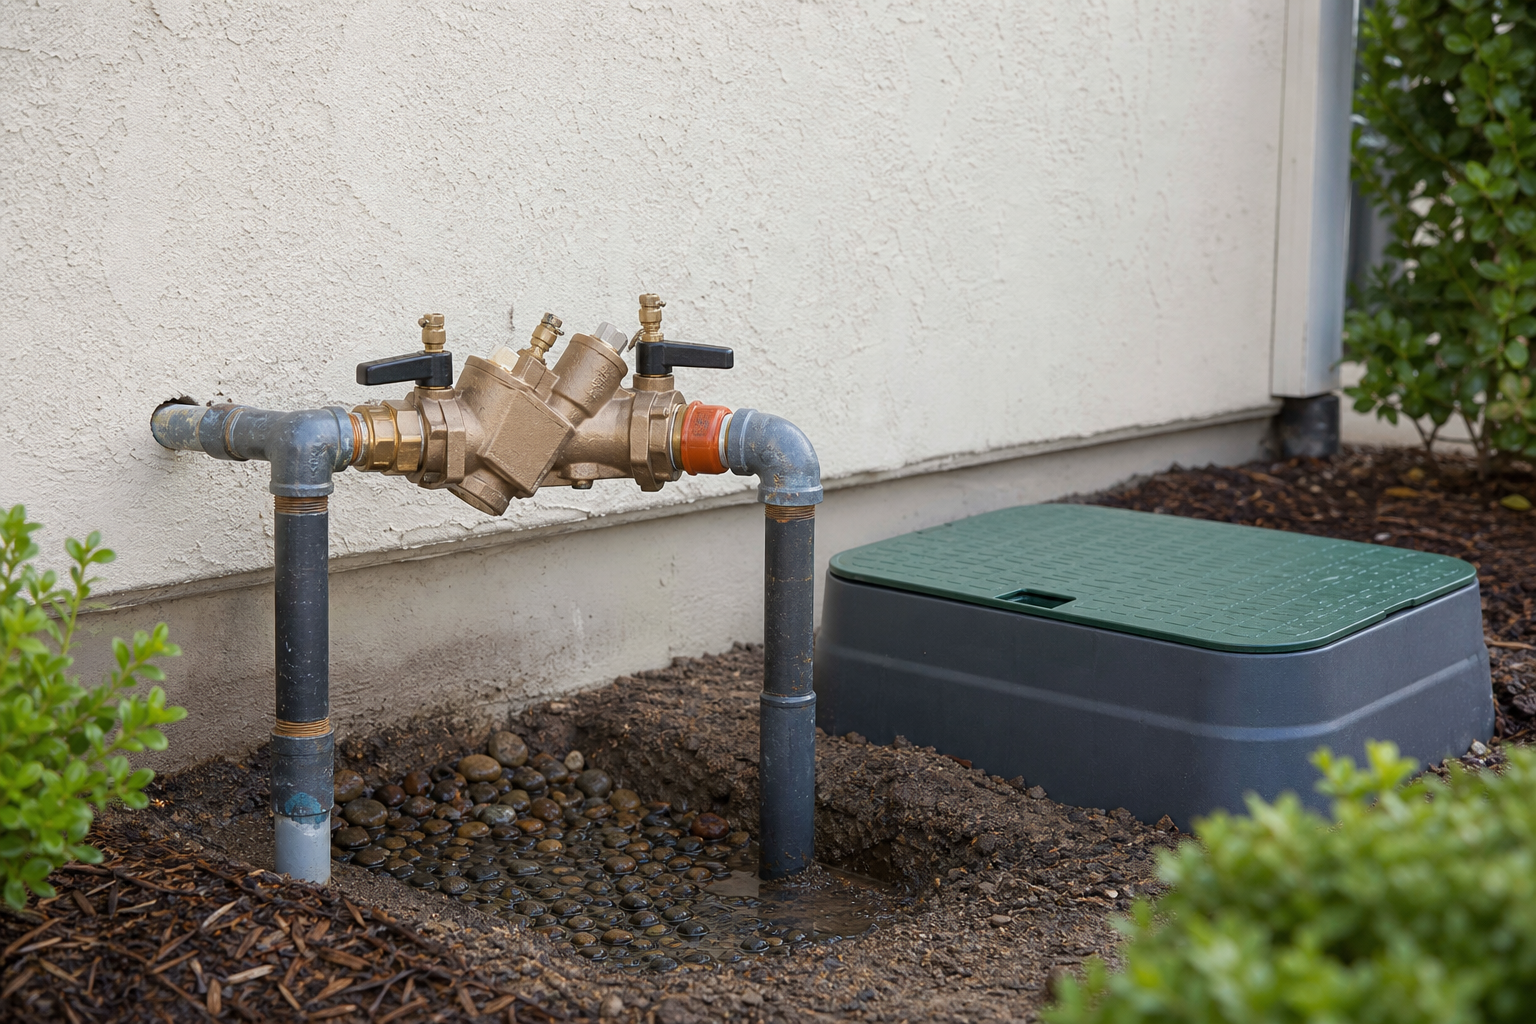
Key Takeaway:Do not select a device by pipe size alone. The hazard and local approval rules decide the correct assembly.
Step 2: Shut Off the Water, Relieve Pressure, and Prepare the Piping
Safe preparation keeps the line from flooding the work area. Before you install a backflow preventer, shut off the nearest upstream valve and confirm that water has stopped.
Open a downstream faucet or drain point. Let pressure fall until flow stops. Do not loosen a union, test cock, or threaded fitting while the line remains pressurized. Water trapped behind a valve can spray with enough force to cause injury or damage finished surfaces.
Gather the parts before cutting pipe:
Backflow prevention components specified for the installation.
Two shut-off valves if the design requires them.
Unions or approved service connections.
Pipe cutter, wrench, level, tape measure, and bucket.
Thread sealant approved for the pipe and water system.
Drain tubing or a suitable discharge route for the assembly.
Expose enough pipe to work without bending the line. If the assembly sits underground, remove loose dirt from the full work area. Dirt inside a fitting can keep a seal from closing. It can also damage the check mechanism after the water returns.
Cut out only the section needed for the approved layout. Keep the pipe ends square. Dry-fit the unions and assembly first. This catches a reversed device or a poor height before sealant touches the threads.
Backflow is tied to two pressure conditions, back pressure and back siphonage . That distinction matters because the device must match the way contamination could enter the supply. A useful reference is the technical overview of backflow and back-siphonage .
Do not use ordinary pipe dope or tape unless the product allows it. Keep sealant away from the pipe opening. Excess material can break loose and foul the check valves.
Pro Tip:Take a photo of the original pipe layout before cutting. It gives the plumber or inspector a clear record if the line has more than one branch.
Step 3: Install the Assembly in the Correct Flow Direction and Orientation
The device must face the direction marked on its body. When you install a backflow preventer, treat the arrow as a hard rule. It should point from the supply toward the protected side.
Set the assembly so its body is supported and its test ports remain reachable. Do not force the pipe into alignment by pulling on the device. That stress can crack a fitting or leave the assembly under strain after the trench is filled.
Use unions where the design permits them. Unions make future removal less destructive. They also help a tester work on the device without cutting the line. Keep enough space around the test cocks for a gauge and drain hose.
For a testable backflow device, position the test ports where a technician can reach them from the box opening. Some installers use a double-box layout. The lower box gives room around the pipe. The upper cover gives direct access to the test ports. This is useful when the assembly needs yearly testing.
A backflow device with a relief discharge needs a drain path. Never seal that discharge into a space where water can collect against the device. Route it toward a suitable drain or approved outdoor discharge point.
Hand-tighten threaded parts first. Then use the correct wrench on the fitting, not on delicate test cocks or the device body. Follow the manufacturer's torque and connection instructions. If the pipe, device, or fittings do not align without force, stop and revise the layout.
A licensed plumber should handle a commercial installation when the local authority requires licensing, permits, or certified testing. Primewest Plumbing can review a cross-connection concern before a property manager closes the access box.
Step 4: Restore Water Slowly, Check for Leaks, and Verify Operation
Restoring water slowly protects the new seals and gives you time to spot trouble. After you install a backflow preventer, open the upstream shut-off valve a small amount.
Pause. Watch every joint. Check the union connections, threaded ends, shut-off valves, and test ports. A dry paper towel can show a small seep that is hard to see by eye.
Once the upstream side stays dry, open the downstream valve gradually. Let air leave through a faucet or approved outlet. Do not create a sudden pressure surge by opening every fixture at once.
Check the protected equipment while the line runs. An irrigation system may show a failed zone valve. The connected equipment may reveal a flow restriction. If the home also needs a treatment system, Primewest Plumbing's water filtration and purification service can help separate a backflow issue from a filter problem.
Some water at the relief port during startup may occur while air leaves the assembly. Continued discharge is different. It can point to debris, a damaged check, excess pressure, or a device that is not installed level according to its instructions.
Do not treat the absence of a leak as proof that the assembly passed. A gauge test may be required. Commercial systems and higher-risk connections often need documented testing by a certified technician. Keep the test report with the property records.
Key Takeaway:A leak check confirms the pipe joints. A certified performance test confirms the assembly works.
Step 5: Finish the Installation, Protect the Device, and Know When to Call a Plumber
The last step is protecting access without trapping water or hiding a defect. A backflow preventer should remain visible enough for inspection and reachable for testing.
For an outdoor unit, use an approved enclosure or backflow box with enough internal space. Do not pack soil against the body. Do not bury test ports under mulch. The cover should keep out lawn debris while allowing drainage and air movement.
Place warning or identification marks only where local rules require them. Keep the box lid level with the finished grade. Before backfilling, take a clear photo of the completed assembly and its valve positions.
Use clean fill around the piping. Remove rocks that could press against a joint. Compact the soil in shallow layers. Heavy compaction directly over the assembly can shift the pipe or crush a plastic enclosure.
Primewest Plumbing is the right next step when the device is cracked, the relief port keeps draining, or the line cannot be depressurized. It is also the safer choice when the work involves a commercial property, a fire system, specialized piping, or a required annual test.
Call a licensed professional before removal if you cannot identify the upstream shut-off valve. The same applies if water remains under pressure after the valve is closed. A failed shut-off can make a small repair turn into an uncontrolled water release.
Keep these records:
Device make, model, and size.
Installation date and location.
Photos before the box is closed.
Test results and tester details.
Any local approval or permit record.
For Orange County homeowners and property managers, the Primewest Plumbing residential and commercial plumbing service page is a useful starting point when the job needs inspection, repair, or a written scope.
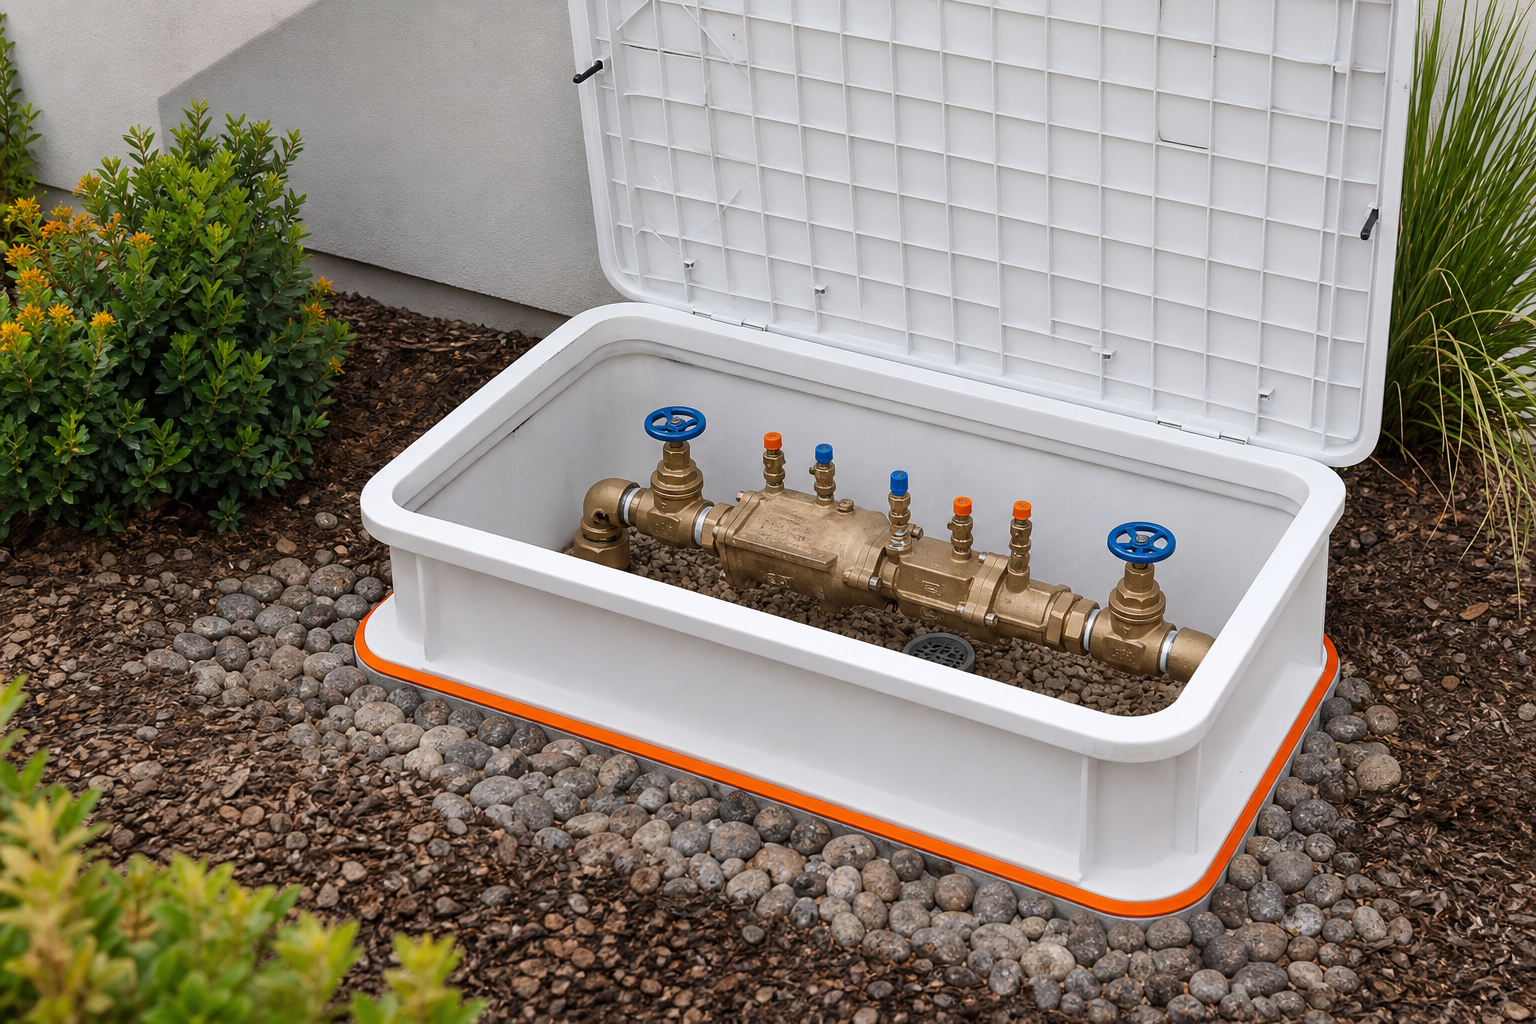
Do not close the project until the assembly can be tested without excavation. That one decision saves time during the next inspection.
FAQ
Is DIY installation of a backflow preventer appropriate?
You can handle a simple residential replacement only if the device type, pipe layout, and local rules are clear. Many installations need a licensed plumber or certified tester. Commercial work may require permits and documented testing. If you cannot shut off or fully depressurize the line, stop. Primewest Plumbing can assess the connection before removal.
Where should a backflow preventer be installed?
A backflow preventer belongs on the supply line before the protected equipment or branch. The exact height and clearance depend on the device and local rules. Keep the body, shut-off valves, and test ports accessible. Outdoor units need drainage and protection from soil, weather, and impact.
Does a backflow preventer need annual testing?
Many commercial and higher-risk assemblies need yearly testing by a certified technician. The exact rule comes from the local water purveyor or authority. A visual leak check is not the same as a gauge test. Keep every test report with the building's plumbing records.
Why is water leaking from the backflow preventer?
Water may leak because of debris, a worn seal, excess pressure, a damaged housing, or a failed check. A small discharge during startup can differ from steady discharge. Shut the water off if the leak grows. Do not remove the assembly until the line is fully depressurized.
Can a backflow preventer be buried?
A backflow preventer should not be buried in a way that blocks inspection or testing. Use an approved box when an outdoor installation needs protection. Leave room around the test ports. Keep the lid at finished grade and provide a path for water to drain.
Conclusion
Choose the device by hazard, install it in the marked flow direction, and confirm that testing remains possible after the work is done. For a commercial line or any connection that will not depressurize safely, have Primewest Plumbing inspect the layout and provide the next service step.


Comments