


How to Descale a Tankless Water Heater
- Primewest Plumbing
- Aug 13
- 9 min read

Mineral scale can narrow water paths inside a tankless heater and make hot water less reliable. The job usually takes a pump, two hoses, a bucket, and the right cleaning solution. Follow these steps to descale the unit safely, then test the water before putting the heater back into normal service.
Table of Contents
Step 1: Turn Off the Heater and Prepare the Work Area
Before you descale a tankless water heater, remove every source of heat and pressure. This protects you from hot water and keeps the pump from forcing liquid through an active heater.
Start by setting the temperature control to its lowest setting. Turn off the gas supply on a gas-fired model. For an electric model, switch off the correct breaker. If you aren't sure which breaker controls the heater, stop and identify it before continuing.
Next, close the cold-water inlet valve and the hot-water outlet valve. Close the gas isolation valve if the heater uses gas. Wait until the water inside the unit cools. Open a nearby hot-water tap for a few seconds to release pressure, then close it.
Put a bucket beneath the service valves. Some water will spill when you remove the caps. Wear gloves and eye protection, especially if you plan to use a commercial descaler. Use appropriate PPE for the hazards in the task.
Have these items within reach:
A submersible pump made for moving water.
Two hoses that fit the heater's service ports.
A clean bucket large enough to hold the solution.
Approved descaling solution or plain white vinegar.
A small filter or screen for the pump intake.
A towel, gloves, eye protection, and a pH test strip if available.
Check the manual before touching the service valves. Valve layouts differ by model. If the heater has no service valves, the wiring looks damaged, or the unit is leaking, Primewest Plumbing can inspect the system before scale removal begins. A leak or wiring fault needs repair, not a cleaning cycle.
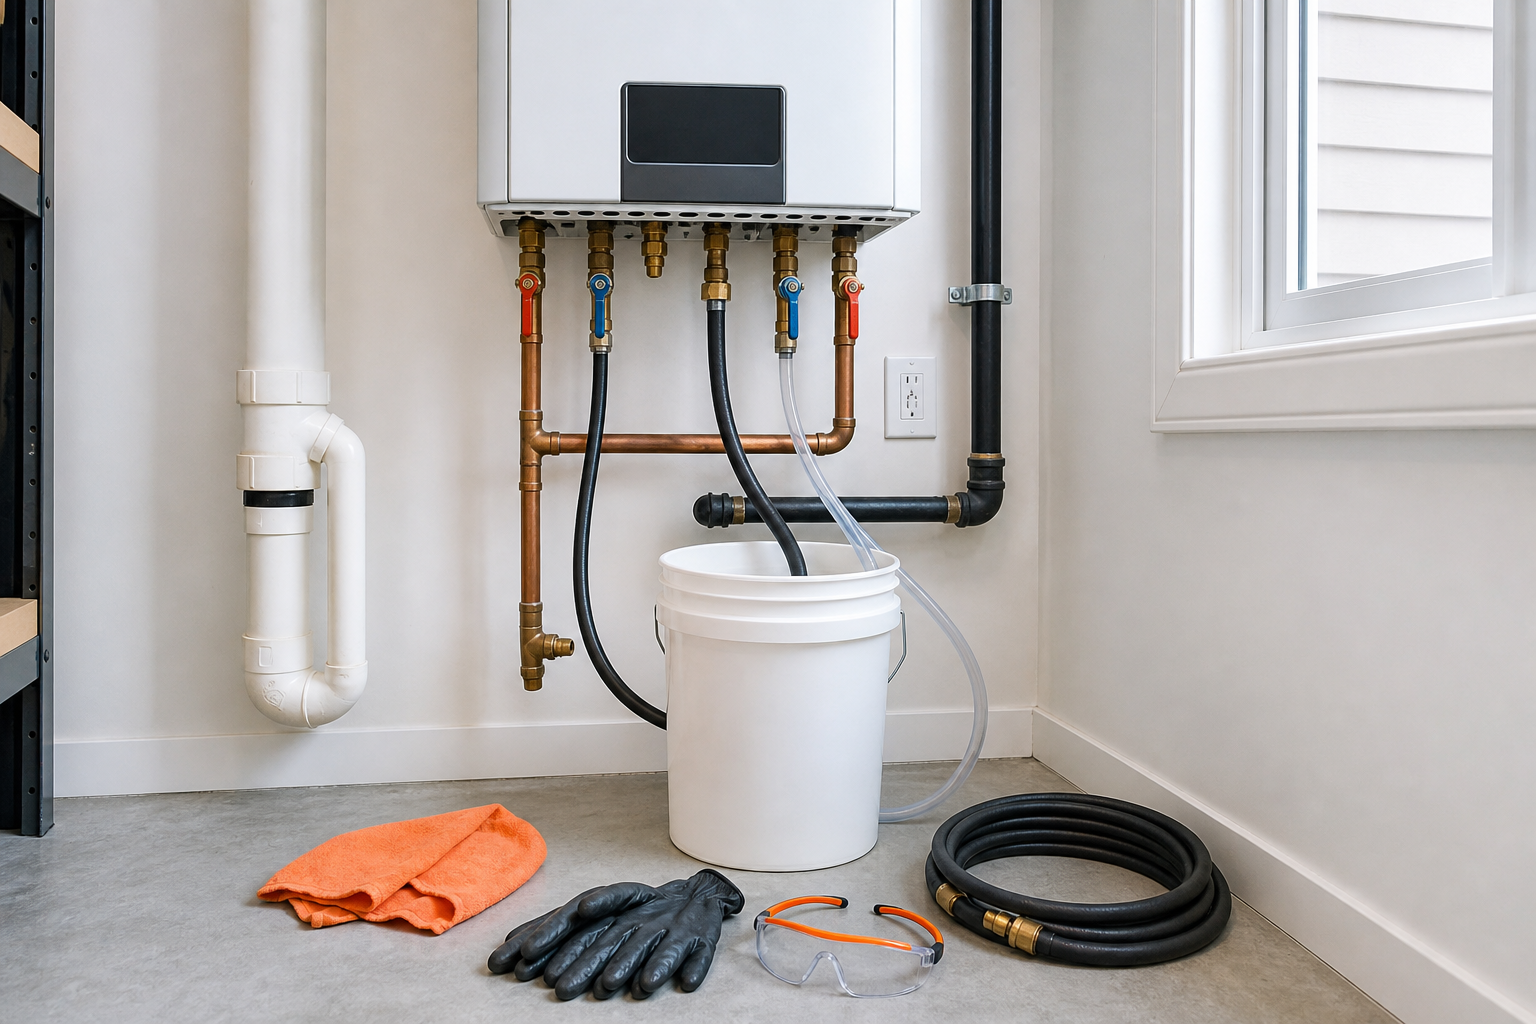
Key Takeaway:The heater must be cool, isolated from the water supply, and disconnected from gas or electrical heat before you open the service ports.
Step 2: Connect the Pump, Hoses, and Descaling Solution
To descale the heat exchanger , you need to make a closed loop. The pump sends the cleaning liquid into one service port. The liquid leaves through the other port and returns to the bucket.
Remove the caps from the hot and cold service valves. Keep a towel under each port. Attach one hose to the pump outlet and connect that hose to the cold-water service port. Attach the second hose to the hot-water service port. Place the free end of that hose inside the bucket.
Set the pump in the bucket. Keep the pump fully covered by liquid, but keep its electrical connection away from standing water. If the pump has a filter, fit it over the intake. This helps keep loosened bits of scale from being pulled back through the pump.
Add the descaler only after the connections are secure. Follow the product label for dilution, contact time, and safe handling. A commercial product may work faster on heavy scale, but it can be more irritating to skin and eyes. White vinegar is less aggressive, yet it may need more time and may not suit every manufacturer's instructions.
Never mix vinegar with another cleaner. Never mix two commercial chemicals. The liquid must also be compatible with the heater's heat exchanger, seals, and hoses. If the manual names a required solution, use that direction instead of relying on a general recipe.
Before starting the pump, check each connection by hand. The hose at the pump must not point toward an outlet, breaker, or other electrical part. Keep children and pets away from the work area. A spill can spread across a floor quickly.
Primewest Plumbing often checks the filter and service valves during water heater repair because a blocked filter can look like a scale problem. A dirty inlet screen restricts flow before water even reaches the heat exchanger.
If you have a water softener, note its current setting and condition. Softened water can reduce new scale, but it doesn't remove scale already inside the heater. A basic water-hardness test can help you decide whether a yearly cleaning is enough or whether the unit needs attention sooner.
Step 3: Circulate the Descaler Through the Heat Exchanger
Now circulate the solution through the heater so it can break down the mineral layer. This is the main cleaning stage in the process.
Confirm that both service valves are open while the hot and cold water isolation valves remain closed. Plug in the pump. Watch the bucket for the first few minutes. The liquid should move through the hose and return to the bucket in a steady loop.
Let the pump run for the time stated on the solution label or in the heater manual. Many descaling instructions use a circulation period of about an hour, but the correct time depends on the product and the amount of scale. Don't leave the pump running unattended.
Look at the returning liquid during the cycle. It may become cloudy as mineral deposits loosen. Small flakes can also appear. Stop the pump if the hose slips, the bucket starts to overflow, the pump runs dry, or you smell gas or burning insulation.
Do not turn on the burner or energize the heating elements while the descaler is moving through the unit. The cleaning liquid should pass through the heat exchanger without the heater producing heat.
For a visual reference, use the official video embed below as a supplement to the model manual. It shows the general service-valve arrangement, but it doesn't replace the instructions for your exact heater.
Check the solution near the end of the cycle. If it is still clear and the heater had signs of heavy scale, the cleaning may not be complete. You can stop the pump, inspect the hose connections, and restart only if the solution remains usable under its label directions.
Use a pH strip only as a rough check. A changed pH can show that the solution has reacted, but it cannot prove that every deposit is gone. Water clarity is also a clue, not a lab test. A flow problem that remains after flushing may point to a blocked filter, a sensor fault, or a plumbing restriction.
If the unit makes a sharp noise, leaks at a valve, or shows an error code, end the process. Primewest Plumbing can diagnose the heater without forcing a chemical cycle through a failing part.
Step 4: Flush the Heater With Clean Water
Flushing removes the spent solution and loose mineral pieces. Do this fully. Residual cleaner can damage parts or affect the first hot water you use.
Switch off and unplug the pump. Keep the hose connections in place. Empty the bucket away from plants, storm drains, and surfaces that the solution could damage. Follow the product label and local disposal rules. Never pour an unknown chemical into a drain without checking its instructions.
Refill the bucket with clean water. Put the pump back in the bucket. Open the cold-water isolation valve for the heater, then open the cold service valve according to the manufacturer's valve sequence. Pump clean water through the heat exchanger and return it to the bucket.
Use fresh water for the full rinse period stated in the manual or solution instructions. Replace the bucket water if it becomes cloudy. Continue until the water runs clear and no strong chemical smell remains.
When the rinse is done, switch off the pump. Close the service valves. Disconnect the hoses slowly and keep the bucket below the ports. Replace both service-valve caps and check that they sit squarely. Open the cold-water isolation valve and the hot-water outlet valve in the order listed by the manual.
Clean the inlet filter before you finish this stage. Remove it only after the water supply is isolated. Rinse away trapped grit with clean water. Inspect the mesh for tears. Put the filter back in its original position and tighten the cap by hand before making a final leak check.
A broader water heater maintenance checklist can help you track this filter check alongside other safety inspections. It is easier to spot a pattern when you record the date, water condition, and any error code after each service.
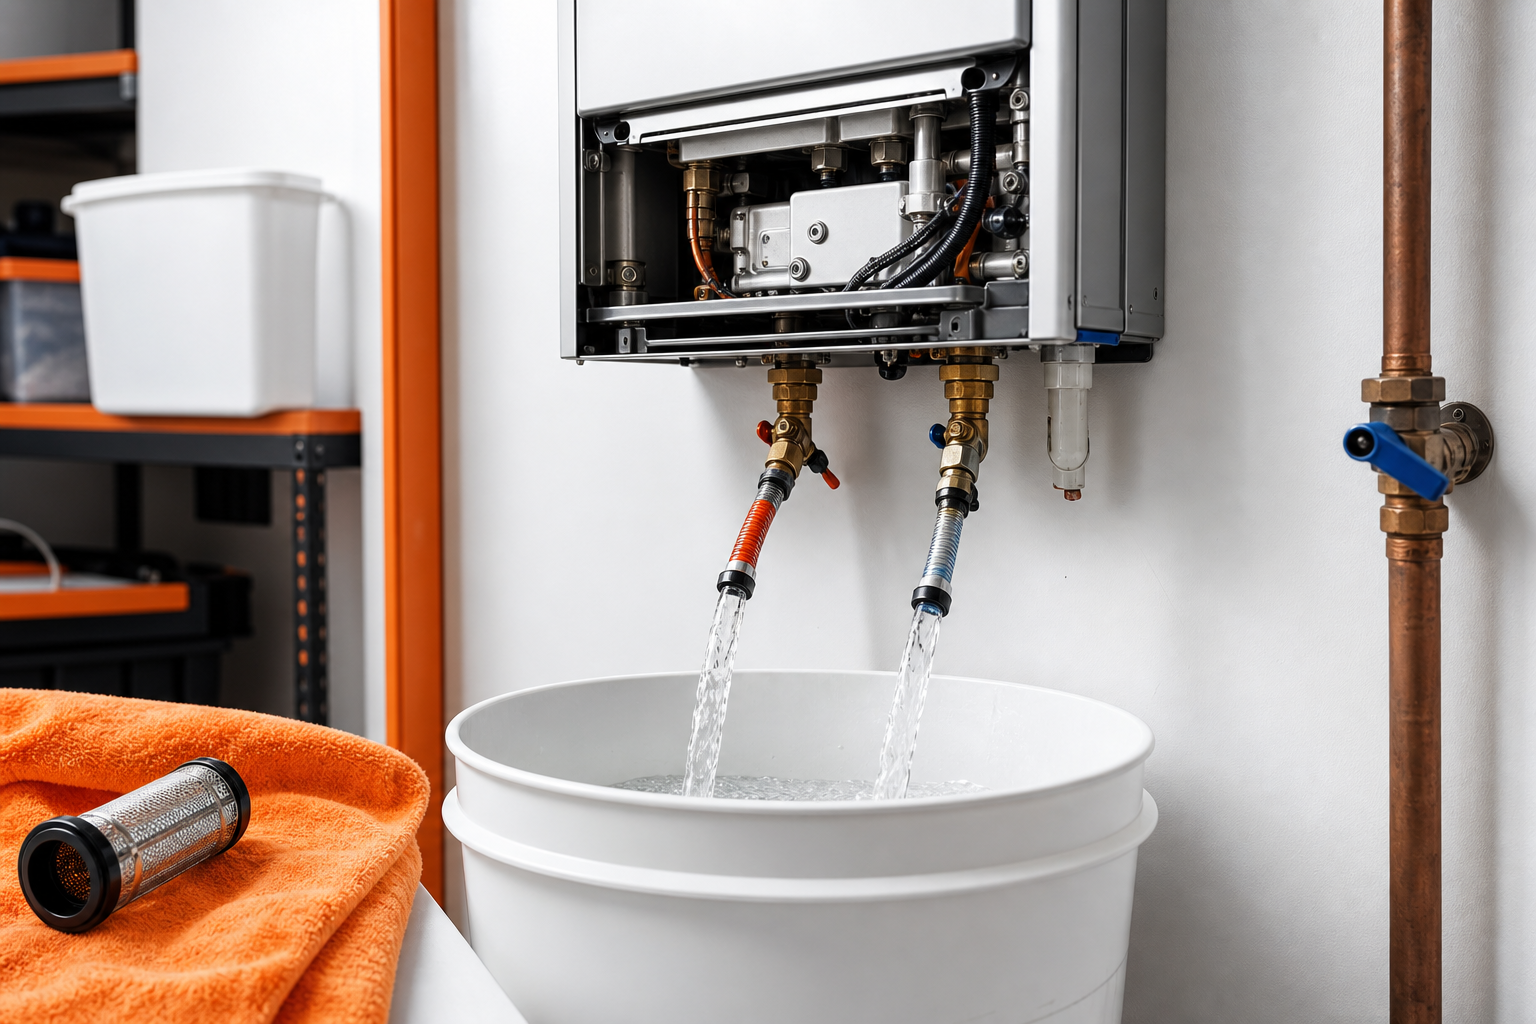
Pro Tip:Save a small sample of the final rinse water in a clear cup. Cloudiness, flakes, or a chemical odor means the rinse needs more time.
Step 5: Restore Service and Check Hot-Water Performance
Restoring service brings the heater back online without trapping air or leaving a leak hidden behind the unit.
First, open the cold-water inlet valve fully. Then open the hot-water outlet valve if your model uses one. Open a nearby hot-water tap and let water flow until the stream is steady. This purges air from the plumbing.
Inspect every service connection. Look for a slow drip at the caps, valve stems, hose fittings, and filter housing. Wipe each joint with a dry towel. Check again after several minutes. A dry first check can miss a slow leak.
For a gas model, open the gas isolation valve only after the water side is full and leak-free. Restore electrical power to the controls. For an electric model, switch the breaker back on only after water flows steadily from the hot tap. Do not energize an electric heater with an empty heat exchanger.
Set the temperature to its former level. Avoid raising it to compensate for a weak flow problem. Excess heat can increase burn risk without fixing a blocked inlet or faulty sensor.
Test one fixture at a time. Start with a nearby faucet. Check whether hot water starts within the normal delay for the system. Then test a shower or second fixture. Note changes in flow, temperature, noise, and any display code.
Scale can cause reduced flow and uneven heat, but descaling won't repair every fault. If the water remains weak, check the aerator and showerhead for loosened debris. If the heater still shuts down, produces an error, or leaks, stop using it and arrange a professional inspection.
Primewest Plumbing provides tankless water heater repair and installation for homeowners and property managers in Orange County. In areas such as Mission Viejo, Dana Point, and Laguna Niguel, the right service interval can depend on water hardness, use, and the condition of any filtration equipment.
Record the service date and the result of the flow test. A common starting interval is every 12 to 18 months. Hard water may call for more frequent service. A properly maintained softener or filter may extend the interval, but only the heater's performance and inspection history can confirm that choice.
Key Takeaway:The job is complete only after the heater is rinsed, the inlet filter is clean, every connection stays dry, and hot water works without an error code.
FAQ: Tankless Water Heater Descaling Questions
How often should I descale a tankless water heater?
Most tankless heaters need descaling about every 12 to 18 months, but water hardness can change that schedule. Test the water or review the heater's maintenance instructions. A water softener may reduce new scale, yet it doesn't remove existing deposits. Reduced flow, temperature swings, or a scale-related error may mean the unit needs service sooner.
Can I use vinegar to descale a tankless water heater?
Vinegar may work for light mineral buildup, but you should use it only when the heater manual allows it. Commercial descalers may be better suited to heavy deposits, though they require careful handling. Never mix vinegar with another cleaner. Follow the product label for contact time, dilution, protective gear, and disposal.
Do I need to turn off the gas before descaling?
Yes, turn off the gas supply to a gas-fired heater before descaling and keep the burner off during circulation. Electric models need their breaker switched off instead. Also close the water isolation valves and wait for the unit to cool. If you cannot identify the correct controls, use a licensed plumber.
How do I know when the descaling is finished?
Descaling is usually finished after the required circulation time, followed by a clean-water rinse that runs clear and has no strong chemical odor. A pH strip or clear sample can provide a rough check. Neither test proves full removal. Persistent low flow or error codes need diagnosis beyond another chemical cycle.
When should a plumber descale my tankless water heater?
A plumber should handle the job when the heater leaks, lacks service valves, shows wiring damage, or continues to display an error after flushing. Professional service also makes sense when the unit has severe scale or poor flow that could come from another fault. Primewest Plumbing can inspect the heater and recommend repair when cleaning alone won't solve the problem.
Conclusion
Descaling is safest when you follow the heater manual, isolate the unit fully, circulate the solution under supervision, and rinse until the water is clear. If the heater leaks or still performs poorly after cleaning, stop the DIY work and contact Primewest Plumbing for a tankless water heater inspection in Orange County.


Comments